
Introduction:
In today’s digital age, having a printer connected to Wi-Fi is more essential than ever. It offers convenience and flexibility, allowing you to print documents from multiple devices without physical cables. If you’re wondering how to connect Brother printer to WiFi, it’s a process that requires a few preliminary steps and considerations to ensure a smooth setup.
Preparing for the Connection:
Key Considerations:
Before diving into how to connect Brother printer to WiFi, ensuring your printer has Wi-Fi capabilities is crucial. Not all Brother printers have this feature, so check your model’s specifications to confirm that it supports wireless networking. For instance, the Brother HL-L2370DW series is designed with built-in wireless support, whereas the Brother HL-L2300D series lacks this capability. Ensuring your printer is Wi-Fi enabled is the first step in how to connect Brother printer to WiFi.
Verify that your printer is compatible with your home or office Wi-Fi frequency band. Most modern printers, including Brother models, support the 2.4GHz or 5GHz frequency bands. However, some older or more basic models only support the 2.4GHz band. Knowing this will help you troubleshoot any potential issues related to network compatibility when learning how to connect Brother printer to WiFi.
Setting Up Your Brother Printer for Wi-Fi:
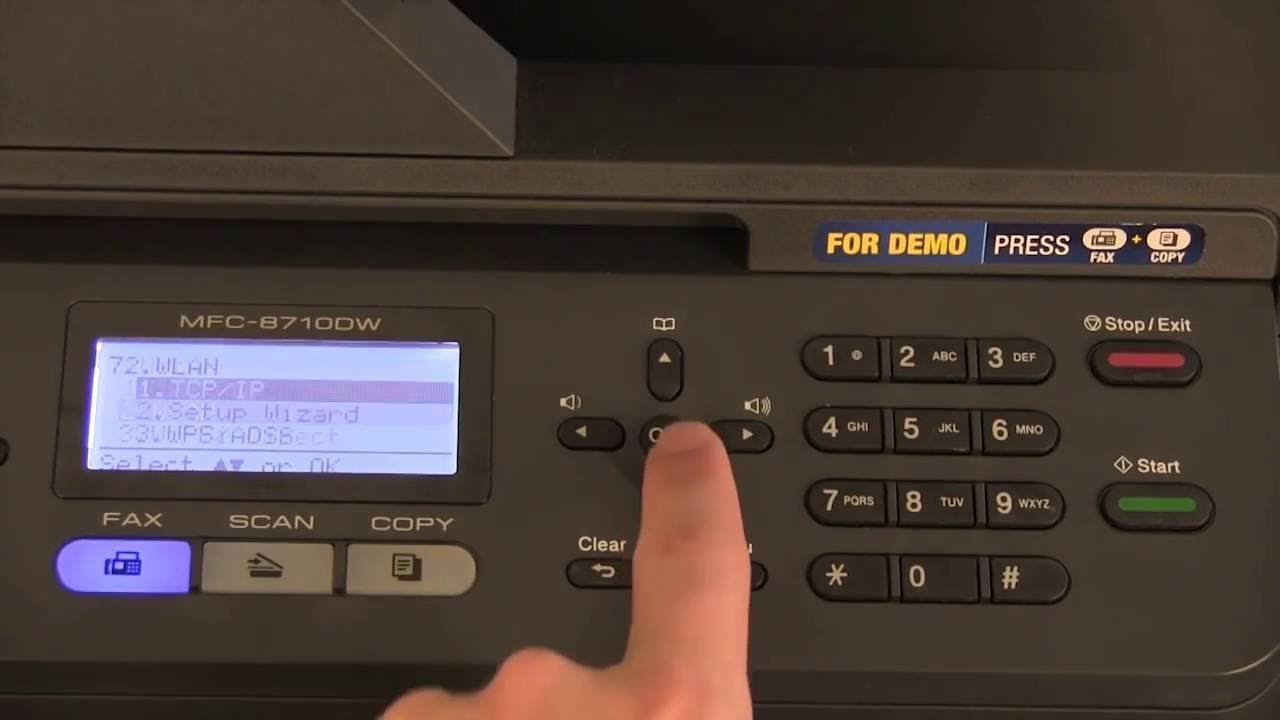
Once you’ve confirmed that your Brother printer supports Wi-Fi, the next step in how to connect Brother printer to WiFi involves setting up the printer’s wireless network connection. This process typically starts with the printer being turned on and ready for configuration. Navigate to the printer’s control panel and locate the network or Wi-Fi settings.
Most Brother printers have a “Network” or “Wi-Fi” option in the menu. To start the setup procedure, choose this option. After that, your printer will look for open networks. When prompted, choose your Wi-Fi network from the list of available networks. If your network is not visible, ensure that your router is powered on and broadcasting the signal correctly.
Connecting to Your Wi-Fi Network:
After selecting your Wi-Fi network, the next step in how to connect Brother printer to WiFi is to enter the network password. This is a crucial step, as the printer must authenticate with your router to establish a connection. To enter your Wi-Fi password, use the control panel on your printer. Most Brother printers will display an on-screen keyboard for this purpose. Carefully enter the password to avoid errors.
Verify the settings and establish the connection after entering the password. Your Brother printer will attempt to connect to the Wi-Fi network, which might take a few moments. The printer should show a confirmation message confirming that it has successfully connected to the network. At this point, your printer’s Wi-Fi indicator light should also turn on, signalling that the connection has been established.
Testing the Connection:
You should test the connection to ensure the printer has been appropriately connected to Wi-Fi. This involves printing a test page or document from a device connected to the same network. Open a document or image you wish to print on your computer or mobile device. From the list of available printers, choose the Brother printer. The connection has been established if the printer appears and you can send a print job successfully.
If you encounter issues during this step, it may indicate a problem with the Wi-Fi setup. Double-check that the printer is within range of your Wi-Fi signal and that no obstacles or interference affect the connection. Additionally, confirm that your Wi-Fi network is functioning correctly by testing the connection with other devices.
Troubleshooting Common Issues:
Understanding how to connect Brother printer to WiFi also involves troubleshooting common issues that might arise. If your Brother printer fails to connect to Wi-Fi, ensure that the correct Wi-Fi network is selected and that the password is accurately entered. If the connection fails, restart your printer and router and attempt the connection process again.
Another common issue might be that the printer is not displaying any available networks. In such cases, ensure the printer’s wireless function is turned on. Some Brother printers have a dedicated button to turn Wi-Fi on or off, so ensure it is activated.
If you continue to experience difficulties, you might need to consult your printer’s manual or contact Brother support for further assistance. They can offer particular troubleshooting procedures based on the printer model you own.
Using the Brother Printer’s Software:
In addition to the manual setup process, you can also use Brother’s software for a more streamlined setup. The Brother printer setup software, available on the Brother website, provides an easy-to-follow guide for how to connect Brother printer to WiFi. Download and install the software on your computer, then follow the on-screen instructions to connect your printer to your Wi-Fi network. This method can be beneficial if you encounter difficulties with the manual setup process.
Conclusion:
In summary, knowing how to connect Brother printer to WiFi involves several key steps, including verifying Wi-Fi capabilities, setting up the printer’s network settings, entering the correct password, and testing the connection. Ensuring that your printer is compatible with your network and troubleshooting any issues will help you achieve a successful wireless setup. By following these steps, you can enjoy the convenience and flexibility of wireless printing with your Brother printer.